
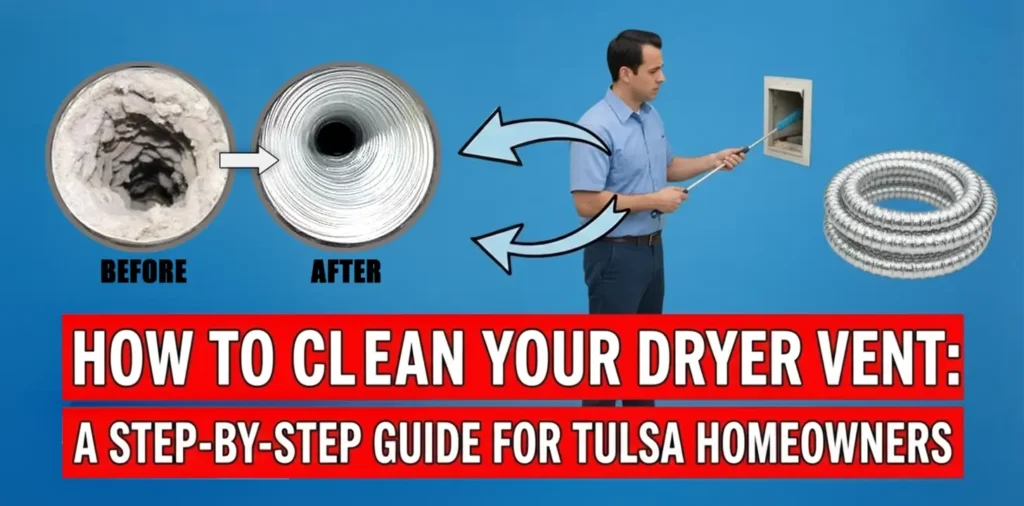
Cleaning your dryer vent is crucial for home safety and energy efficiency, and this guide provides Tulsa homeowners with a comprehensive, step-by-step approach to this essential task. You’ll discover why a clear vent prevents fire hazards, helps reduce energy bills by improving appliance performance, and extends your dryer’s lifespan. By preparing with the right tools, you can confidently navigate each stage of the cleaning process, from disconnecting power to thoroughly clearing the ductwork and exterior hood. Ensuring a job well done involves key quality checks, and understanding expert tips and common pitfalls helps you maintain your system effectively. This proactive maintenance not only safeguards your home against risks like the thousands of dryer fires occurring annually but also contributes to overall indoor air quality and comfort, creating a more efficient and safer living environment.
Why a Clean Dryer Vent is Non-Negotiable for Tulsa Homes
A clean dryer vent is vital for home safety and energy efficiency. Clogged vents pose a serious fire risk. The U.S. Fire Administration reports dirty vents caused 31% of dryer fires from 2018-2020. Restricted airflow forces your dryer to work overtime, hiking up energy bills and shortening its lifespan. Nobody wants an energy hog, especially in Oklahoma’s extreme climate. For true peace of mind, professional dryer vent cleaning boosts safety and appliance performance. Knowing these risks is one thing, but how can you tell if your dryer vent needs attention?
- 31% of dryer fires caused by failure to clean (2018-2020)
- 13,820+ dryer fires reported annually (2017-2021)
- Lint is the leading material first ignited in dryer fires
- $238 million in property damage annually from dryer fires
Gathering Your Tools: What You’ll Need Before You Start
Cleaning your dryer vent is vital for safety and efficiency. A clogged vent is a serious fire hazard. The National Fire Protection Association (NFPA) reports thousands of dryer fires annually. Get your tools ready; this crucial task is easier than you think.
Essential Tools for Dryer Vent Cleaning
So, what’s in my toolkit for a dryer vent clean-out? Here are the essentials:
🧰 Your Dryer Vent Cleaning Toolkit
- Screwdriver: A reliable screwdriver helps carefully remove the vent cover, giving you full access to the ductwork.
- Vacuum Cleaner with Attachments: Your trusty vacuum, especially with hose attachments, is perfect for sucking up loose lint and debris from accessible spots.
- Specialized Dryer Vent Brush Kit: These kits come with flexible rods and brushes designed to reach deep into the system and dislodge stubborn, hidden lint.
- Work Gloves: Protect your hands from sharp edges and dusty debris inside the vent. Safety first, always.
- Flashlight: A bright flashlight illuminates those dark, tricky vent recesses, making sure you don’t miss a single fluff.
- Helper (Optional): An extra set of hands is incredibly useful for moving the dryer or navigating long vent runs.
With these tools in hand, you’re all set to tackle the dirty work and ensure your dryer runs efficiently and safely for years to come.
How to Clean Your Dryer Vent Safely: My Step-by-Step Guide
I can’t stress enough how important regularly cleaning your dryer vent is for keeping your home safe and your dryer running efficiently. It’s all about disconnecting power, clearing out the entire vent system, and putting it all back correctly to banish lint buildup, a notorious fire hazard. Let’s make sure you’re cleaning your dryer vent the right way, starting with safety.
- Disconnect Power and Gas (If Applicable) – Unplug electric dryers from the wall. For gas models, turn off the gas supply valve to prevent shocks or leaks. Safety first!
- Detach the Dryer Vent Hose – Gently pull dryer away from wall. Disconnect vent hose from both dryer and wall. Note any clamps or tape for reassembly.
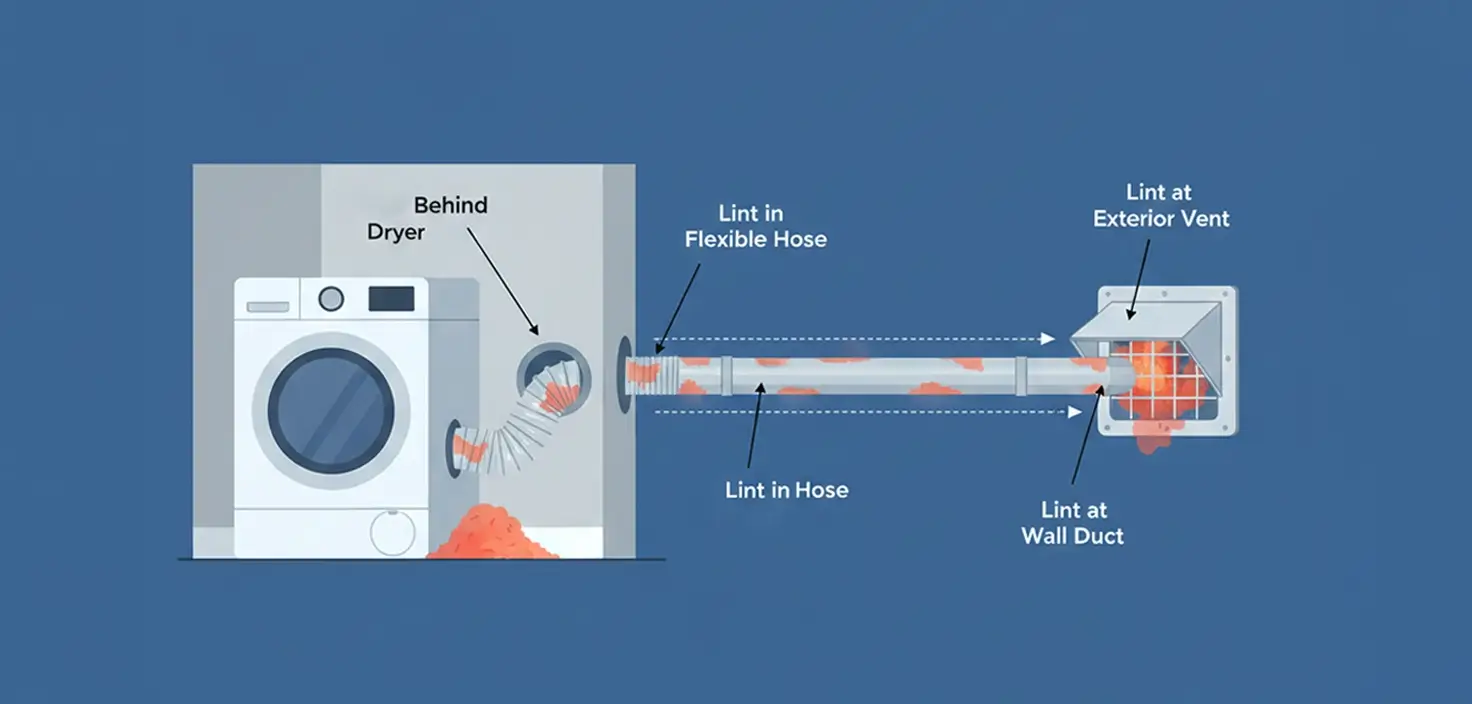
- Clean the Dryer’s Rear and Vent Opening – Vacuum all lint from behind dryer, its exhaust port, and the wall’s vent opening. This is where lint loves to gather.
- Clean the Dryer Vent Ductwork – Use your dryer vent brush kit. Work the brush from both ends, rotating to dislodge stubborn lint throughout the entire duct length.
- Clean the Exterior Vent Hood – Go outside and clear any lint or debris from the exterior vent hood. Ensure the flap opens and closes freely for optimal airflow.
- Reconnect and Test Your Dryer – Securely reconnect the vent hose, slide dryer back into place, restore power/gas, and run a short empty cycle to confirm proper airflow.
1. Disconnect Power and Gas (If Applicable)
Always prioritize safety. Unplug electric dryers from the wall. For gas models, turn off the gas supply valve to prevent shocks or leaks. And yes, this means no sneaky loads of laundry while you’re working. Safety first, my friends. Once the power’s off, it’s time to get that dryer moving.
- Electric dryers: Unplug from wall outlet completely
- Gas dryers: Turn off gas supply valve AND unplug
- Never work on a dryer with power connected
- Wait a few minutes after unplugging before starting work
2. Detach the Dryer Vent Hose
Give your dryer a gentle tug away from the wall. Now, disconnect that vent hose from both the dryer and the wall itself. Pay attention to any clamps or tape; you’ll want to put them back exactly as you found them. With the hose detached, you can now get behind the machine itself.
3. Clean the Dryer’s Rear and Vent Opening
Grab your vacuum and get to work. Clear out all the lint from behind the dryer, its exhaust port, and especially the wall’s vent opening. This is where lint loves to gather, like a secret club. Now, let’s tackle the main highway for that lint: the ductwork.
4. Clean the Dryer Vent Ductwork
Now, for the main event: the ductwork. I recommend using a dryer vent brush kit; trust me, it makes all the difference. Work that brush from both ends of the ductwork, rotating it to really dislodge that stubborn lint. The NFPA reminds us that this drastically reduces fire risk, and I can’t emphasize that enough. After clearing the internal pathways, don’t overlook the exit point.
5. Clean the Exterior Vent Hood
Don’t forget the great outdoors. Head outside and check your exterior vent hood. Clear away any lint or debris that’s accumulated, making sure that flap can open and close freely for optimal airflow. It’s like giving your dryer a breath of fresh air. With all the cleaning done, it’s time for the grand finale: putting everything back together.
6. Reconnect and Test Your Dryer
Almost done. Securely reconnect that vent hose, then carefully slide your dryer back into place. Once power or gas is reconnected, run a short, empty cycle. This confirms proper airflow and ensures no leaks, just like we check after every professional dryer vent cleaning service we provide. If you’d rather leave this dirty work to the pros, you know who to call.
Quality Checks for Your Dryer Vent
Once your dryer vent is clean, confirm strong airflow and efficient drying. Check for quicker cycles and robust air from the exterior vent. If clothes still feel damp or drying takes forever, a deeper look is needed—no one wants perpetually soggy socks!
Confirming Your Clean Vent: Troubleshooting
For robust airflow and shorter cycles, confirm your vent is clear. The U.S. Department of Energy reports lint buildup can increase energy use by over 20%. Persistent dampness or a warm laundry room means deeper issues. Our expert dryer vent cleaning team is ready to help.
| Quality Check | What to Look For | If It Fails |
|---|---|---|
| Airflow Test | Strong air coming from exterior vent when dryer runs | Possible blockage remains – re-clean or call pro |
| Drying Time | Clothes dry in normal cycle time (45-60 min) | Vent may still be restricted |
| Dryer Temperature | Dryer exterior warm but not hot to touch | Airflow still restricted – check for kinks |
| Exterior Flap | Flap opens fully when dryer runs, closes when off | Debris or damage – clean or replace hood |
| Laundry Room Temp | Room stays comfortable during drying | Hot air escaping – check hose connections |
Expert Advice: Tips, Best Practices, and Common Pitfalls to Avoid
Clogged dryer vents are a serious fire hazard and efficiency drain. The U.S. Fire Administration reports ‘failure to clean’ caused 31% of residential dryer fires (2018-2020). Don’t let a mountain of lint turn into a mountain of trouble.
Optimizing Cleaning Frequency and Ducting Choices
To keep your dryer running smoothly, we recommend cleaning the vent annually, or even semi-annually if you have a large family or pets that generate extra lint. Always choose rigid metal ducting, which prevents lint accumulation far better than flexible options.
| Ducting Type | Pros | Cons | Recommendation |
|---|---|---|---|
| Rigid Metal | Smooth interior, best airflow, fire-resistant | More expensive, harder to install | ✅ Best choice |
| Semi-Rigid Metal | Flexible yet sturdy, good airflow | Can be crushed if not careful | ✅ Good alternative |
| Flexible Foil | Cheap, easy to install | Traps lint, kinks easily, fire risk | ❌ Not recommended |
| Plastic/Vinyl | Very cheap | Fire hazard, against most codes | ❌ Never use |
Avoiding Common Pitfalls
Never crush your dryer’s vent hose; this severely restricts airflow, leading to overheating and a fire risk. For complex vent setups or persistent issues, professional dryer vent cleaning from a trusted team like Capehart Heating & Cooling is a smart move to ensure everything is fixed right.
Common Mistakes to Avoid
- Crushing the vent hose when pushing dryer back – restricts airflow
- Using plastic or vinyl ducting – serious fire hazard
- Forgetting the exterior vent – lint accumulates there too
- Skipping the lint trap area – clean inside the dryer housing too
- Using too many elbows/turns – each bend reduces airflow
- Venting into attic or crawlspace – code violation and moisture damage
- Ignoring warning signs – long dry times mean blockage
Best Practices for Long-Term Safety
- Clean lint trap before every load
- Clean vent system at least annually (more with pets/heavy use)
- Use rigid metal ducting whenever possible
- Keep vent runs short – under 25 feet ideal
- Minimize elbows – each 90° turn = 5 feet of straight duct
- Install proper vent hood with backdraft damper
- Schedule professional cleaning for long/complex vents
Beyond the Dryer Vent: Connecting Home Maintenance to Overall Comfort
You know, sometimes the smallest tasks make the biggest difference for your home’s comfort and safety. Take your dryer vent, for instance. It might seem like a minor thing, but ignoring it can lead to major headaches, or even worse, a fire. The U.S. Fire Administration reports that clogged vents were the leading cause of 31% of residential clothes dryer fires from 2018 to 2020. That’s a statistic that certainly gets my attention, and frankly, it’s a good reminder to clear out that lint trap more often than just, well, never.
Beyond the obvious fire hazard, a blocked dryer vent forces your machine to work overtime, wasting energy and hiking up your utility bills. This inefficiency doesn’t just stop at the dryer; it can also make your entire HVAC system, including your air conditioner, labor harder. As dust and lint circulate, your indoor air quality suffers, and your AC filters can quickly get overloaded, affecting the whole home in Tulsa, Oklahoma. Bailey and Brock Capehart believe in a safer, greener home through smarter climate solutions, ensuring every part of your system works in harmony.
- Release lint particles into your home’s air
- Increase humidity in your laundry room
- Make your HVAC system work harder
- Clog AC filters faster
- Raise your overall energy bills
Frequently Asked Questions About Dryer Vent Cleaning
Dryer vent cleaning keeps your home safe and appliances running smoothly. The U.S. Fire Administration reports over 13,820 dryer fires yearly from 2017-2021, often due to lint buildup. Ignoring it means longer drying times, higher energy bills, and a real fire hazard. No one wants soggy clothes or a fire alarm workout.
It is generally recommended to clean your dryer vent at least once a year to maintain optimal efficiency and safety. However, homes with large families, pets, or those that do heavy laundry might benefit from more frequent cleaning, potentially every six months, to prevent excessive lint buildup and ensure proper airflow, as advised by the National Fire Protection Association (NFPA).
Several indicators suggest your dryer vent might be clogged. You may notice your clothes taking significantly longer to dry, feeling unusually hot after a cycle, or having a musty smell. The dryer itself might feel excessively hot to the touch, or the laundry room may become uncomfortably warm. Another clear sign is less lint accumulating in your lint trap than usual, or visible lint and debris around the exterior dryer vent opening.
Yes, a clogged dryer vent can absolutely cause a fire. Lint is highly flammable, and when it accumulates in the dryer vent, it restricts airflow and causes the dryer to overheat. This elevated temperature, combined with a combustible material like lint, creates a significant fire hazard. In fact, U.S. fire departments responded to an estimated average of 15,970 home structure fires involving clothes dryers or washing machines annually between 2010 and 2014, with failure to clean the dryer and venting being a leading factor, according to the NFPA.
While flexible foil ducting is sometimes used, it is not ideal and generally not recommended for dryer vents. Flexible foil ducts can easily kink or crush, creating obstructions that trap lint and restrict airflow, which increases fire risk and reduces efficiency. Rigid metal ducting (either galvanized or aluminum) is significantly safer and more efficient because its smooth interior surfaces and sturdy construction allow for maximum airflow, preventing lint buildup and reducing potential fire hazards.
You should consider calling a professional for dryer vent cleaning in Tulsa if you notice persistent drying issues even after attempting a DIY cleaning, if your dryer vent system has complex turns or a long run making it difficult to access, or if you live in a multi-story home with inaccessible ductwork. Professionals have specialized tools and expertise to thoroughly clean and inspect your entire vent system, ensuring it’s free from obstructions and operating safely, leaving you with peace of mind. For an elevated sense of home comfort and safety, considering a professional assessment can provide lasting assurance.
- Clean your dryer vent at least once per year (more with heavy use/pets)
- 31% of dryer fires caused by failure to clean
- Warning signs: long dry times, hot dryer, hot laundry room, burning smell
- Use rigid metal ducting – avoid flexible foil or plastic
- Clean from both ends of the ductwork for best results
- Always disconnect power before cleaning
- Call a pro for long runs, complex vents, or persistent issues
Your Partner in Home Comfort and Safety
Ensuring your dryer vent is clean and efficient is a critical step in maintaining a safer, more energy-efficient home. When you’re ready to move beyond DIY solutions or simply seek expert assurance for your entire HVAC system, a professional touch makes all the difference.
Schedule your professional HVAC inspection or dryer vent cleaning service with Capehart Heating & Cooling today and experience the honest, flat-rate service that Tulsa homeowners trust for comprehensive home comfort.